
Your roof does more than protect your home from rain and wind; it relies on several critical components working together to keep moisture out. One of the most important yet often overlooked parts of a roofing system is flashing. When flashing fails, even the highest-quality shingles cannot prevent leaks. Understanding Roof Flashing Repair, how it works, and when it needs repair can save homeowners from expensive structural damage.
Whether you are dealing with a small leak or planning preventive maintenance, working with experienced roofing professionals like 3jmext.com ensures your flashing system is properly inspected and repaired.
| Flashing Area | Common Problems | Warning Signs | Recommended Roof Flashing Repair Action |
| Chimneys | Cracked mortar, loose counter flashing | Water stains near the chimney, rust | Reseal joints or replace step and counter flashing |
| Roof Valleys | Corrosion, debris buildup | Leaks during heavy rain | Install new valley flashing and remove debris |
| Skylights | Seal failure, improper installation | Interior water stains around the skylight | Perform perimeter Roof Flashing Repair or full replacement |
| Vent Pipes | Cracked rubber boot, loose seal | Moisture around vent openings | Replace the pipe flashing boot and reseal |
| Wall Intersections / Dormers | Improper step flashing installation | Damp walls or ceiling edges | Reinstall the step flashing properly |
What Is Roof Flashing?
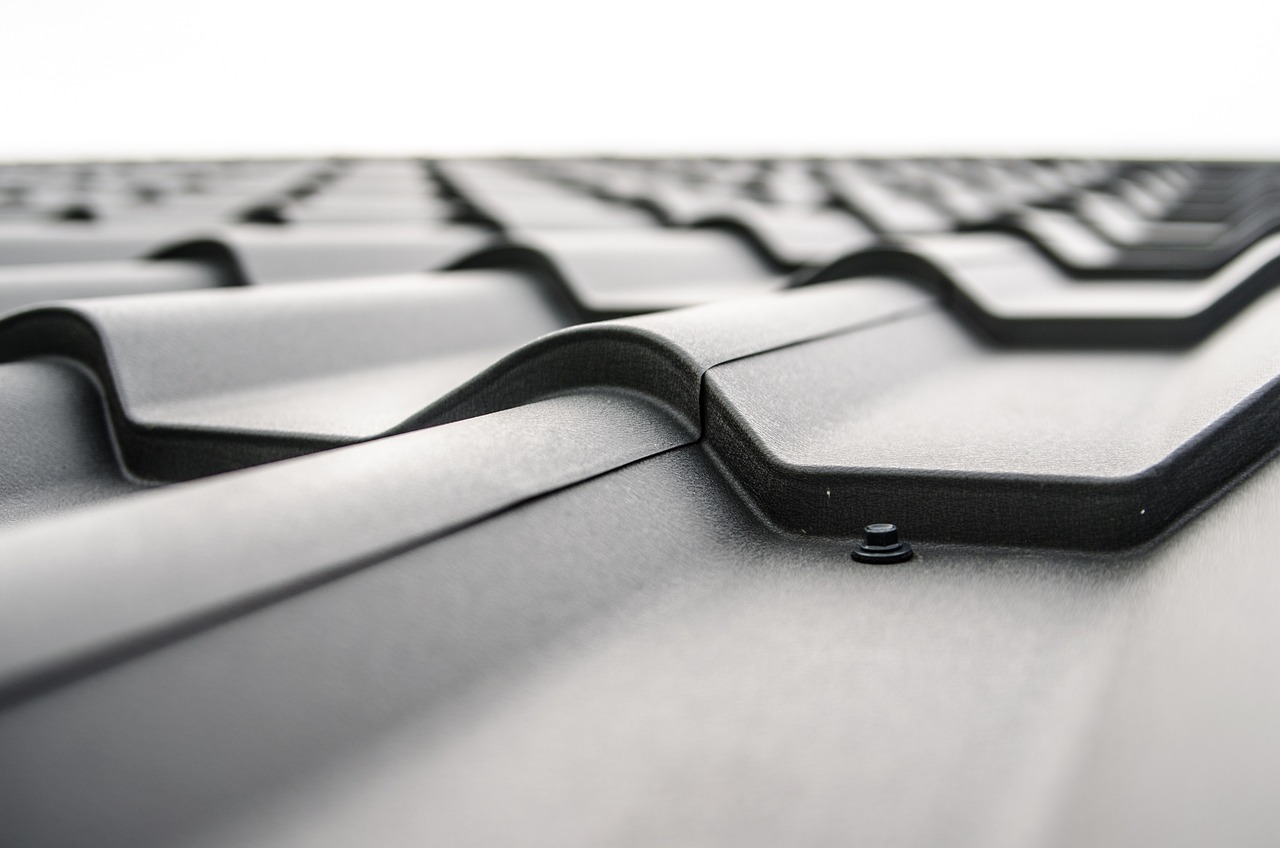
Roof flashing is a thin, waterproof material, typically metal, installed in vulnerable areas of the roof to prevent water from penetrating joints and seams. It acts as a protective barrier, directing water away from openings and transitions where leaks are most likely to occur.
Flashing is commonly made from aluminum, galvanized steel, copper, or other corrosion-resistant materials. Because it seals the most exposed areas of a roof, it plays a crucial role in maintaining a watertight system. Professional roofers such as 3jmext.com carefully integrate flashing with roofing materials to ensure maximum protection.
Why Flashing Is Important for Every Roof
Flashing is essential because shingles alone cannot seal roof intersections. Water naturally follows gravity and can seep into small gaps around roof penetrations. Flashing prevents moisture intrusion by guiding water safely toward gutters and drainage systems.
Without properly installed flashing:
- Water can leak into attics and walls
- Mold and mildew may develop
- Wood decking can rot
- Insulation can become saturated
- Structural integrity may weaken
Routine inspections from experienced contractors like 3jmext help detect flashing issues before they escalate into major damage.
Where Flashing Is Installed on a Roof
Flashing is strategically installed in areas where the roof meets other surfaces or has penetrations. Common locations include:
Chimneys
Step flashing and counter flashing protect the joint between the chimney and the roof. These areas are especially vulnerable because brick and masonry expand and contract differently from roofing materials. Properly installed flashing creates a layered seal that directs water away from the chimney base and prevents leaks from forming around mortar joints.
Roof Valleys
Valley flashing directs water where two roof slopes meet. Because valleys handle large volumes of runoff during heavy rain, they are one of the most leak-prone areas of a roof. Durable metal valley flashing ensures water flows smoothly downward without seeping beneath shingles.
Skylights
Flashing seals the perimeter to prevent leaks. Skylights create openings in the roofing system, making proper sealing essential to prevent moisture intrusion. Well-installed flashing integrates with underlayment and shingles to maintain a watertight barrier around the skylight frame.
Roof Vents and Pipes
Pipe flashing prevents water from entering around vent penetrations. These small openings may seem minor, but they are common sources of leaks if seals crack or deteriorate. Flexible boot flashing and proper sealing materials help maintain a tight fit around pipes.
Dormers and Wall Intersections
Flashing prevents water from seeping where vertical walls meet roof surfaces. These intersections require step flashing layered beneath shingles to channel water downward. Without proper flashing, wind-driven rain can easily penetrate these seams, causing hidden structural damage.
These high-risk areas require proper installation and regular evaluation. Companies like 3jmext.com ensure flashing is installed correctly to prevent long-term issues.
Types of Roof Flashing Materials
Flashing materials vary in durability, cost, and longevity.
Aluminum
Lightweight and corrosion-resistant, but may require a protective coating to extend its lifespan. Aluminum flashing is easy to shape and install, making it a popular choice for many residential roofs.
Key features include
- Lightweight and easy to handle
- Naturally resistant to corrosion
- Affordable option
- Compatible with most roofing materials
Galvanized Steel
Durable and cost-effective, though susceptible to rust over time if the protective zinc coating wears off. It provides strong structural support in high-stress areas.
Key features include
- Strong and impact-resistant
- Budget-friendly
- Suitable for valleys and large sections
- Requires proper maintenance to prevent corrosion
Copper
Long-lasting and aesthetically pleasing, it is often used in premium roofing systems. Copper develops a natural patina over time, enhancing its appearance and durability.
Key features include
- Extremely durable
- Resistant to corrosion
- Elegant, high-end appearance
- Long lifespan with minimal maintenance
Lead
Flexible and commonly used around chimneys due to its ability to conform to irregular shapes. Its malleability makes it effective in sealing complex roof penetrations.
Key features include
- Highly flexible
- Excellent waterproofing properties
- Ideal for masonry transitions
- Long service life
Rubber or Synthetic Flashing
Often used around vent pipes for flexibility and sealing performance. These materials adapt well to movement caused by temperature changes.
Key features include
- Flexible and easy to install
- Provides a tight seal around pipes
- Resistant to cracking
- Cost-effective for smaller penetrations
Selecting the right material depends on your roof type and environmental conditions. A professional consultation with 3jmext can help determine the best option.
Types of Flashing Used on Roofs
Different flashing types serve specific purposes:
- Step Flashing
- Continuous (Apron) Flashing
- Drip Edge Flashing
- Valley Flashing
- Counter Flashing
Understanding these flashing systems helps homeowners recognize potential weak points. Experienced roofers like 3JM evaluate each flashing type during inspections to ensure proper performance.
How Flashing Works With Roofing Systems
Flashing integrates with shingles and underlayment to create a layered waterproof barrier. It is installed beneath shingles in some areas and over shingles in others, depending on the design.
Proper installation ensures water flows over flashing, not underneath it. Incorrect placement can trap moisture and cause leaks. Professional installation from 3jmext ensures flashing works seamlessly with your entire roofing system.
Why Roof Flashing Needs Repair
Roof flashing can deteriorate over time due to constant weather exposure, rust and corrosion, improper installation, expansion and contraction from temperature changes, and physical damage caused by debris. As materials repeatedly expand and contract, seals may loosen, and small gaps can form, allowing moisture to penetrate vulnerable areas of the roof.
Without timely attention, these minor weaknesses can develop into significant leaks and structural damage. Regular inspections by professionals such as 3jmext.com help identify early signs of wear and prevent costly repairs.
Common Signs You Need Flashing Repair
Homeowners should watch for the following warning signs:
- Water stains on ceilings or walls
- Rust or corrosion
- Loose or missing flashing pieces
- Cracked sealant
- Mold or musty odors
If you notice any of these issues, contacting an experienced contractor like 3jmext can prevent further structural damage.
How Roof Flashing Is Repaired
Flashing repair methods depend on the severity of the damage.
Minor Repairs
- Resealing cracks
- Tightening loose flashing
- Replacing small sections
Moderate Repairs
- Removing shingles around the damaged area
- Replacing flashing sections
- Reinstalling roofing materials
Major Repairs
- Full flashing replacement
- Decking repairs
- Structural corrections
Professional repair ensures proper layering and waterproofing. Contractors such as 3jmext.com follow manufacturer guidelines to preserve warranty coverage.
DIY vs. Professional Flashing Repair
While minor sealant fixes may seem manageable, roofing work involves safety risks and technical expertise. DIY repairs may temporarily address surface issues but often fail to resolve underlying problems. Hiring professionals like 3jmext ensures proper diagnosis, durable repairs, and safe working conditions.
Estimated Cost of Roof Flashing Repair
Flashing repair costs depend on:
- Extent of damage
- Material type
- Roof accessibility
- Labor requirements
Minor repairs may cost a few hundred dollars, while larger replacements cost more. However, addressing flashing problems early is far less expensive than repairing interior water damage.
Flashing Maintenance and Prevention Tips
Preventive maintenance extends the lifespan of roof flashing and reduces the risk of leaks. Homeowners should schedule annual inspections, remove debris from roof valleys, inspect sealants regularly for cracks or gaps, monitor for signs of corrosion, and trim nearby tree branches to prevent impact damage.
Taking these proactive steps helps maintain a strong, watertight seal around vulnerable roof areas. Professional maintenance programs from 3jmext.com help ensure flashing remains in optimal condition year-round.
Flashing Installation Best Practices
Proper flashing installation requires:
- Correct shingle integration
- Secure fastening
- Proper overlap
- Quality sealants
- Code compliance
Incorrect installation is a leading cause of flashing failure. Choosing experienced contractors such as 3jmext.com ensures long-term protection and structural integrity.
How to Choose a Contractor for Flashing Repair
Selecting a qualified contractor is essential. Homeowners should:
- Verify licensing and insurance
- Request written estimates
- Check references
- Confirm warranty coverage
- Ask about flashing-specific expertise
Reputable companies like 3JM provide transparent communication and documented repair processes.
Long-Term Value of Proper Flashing Repair
Investing in professional flashing repair protects your home’s structure, prevents interior damage, and extends the roof’s lifespan. Flashing may be a small component, but it plays a major role in waterproofing. Routine inspections and timely repairs from experienced providers like 3jmext.com ensure your roof remains secure and leak-free.
If you suspect flashing damage or need a professional roof inspection, the experienced team at 3jmext is ready to help. From minor flashing repairs to full system replacements, they provide reliable solutions designed to protect your home from water damage. Call (630) 985-6494 or fill out our contact form to schedule your consultation and ensure your roof remains secure and leak-free year-round.
Final Thoughts
Roof Flashing Repair is one of the most critical yet overlooked components of your roofing system. When flashing fails, leaks can quickly develop, leading to structural damage and costly repairs. Understanding the types of flashing, recognizing warning signs, and addressing issues promptly are key to protecting your home.
By partnering with trusted roofing professionals like 3jmext, homeowners can ensure proper flashing installation, repair, and long-term performance. A well-maintained flashing system keeps water where it belongs, off your roof and away from your home for years to come.
FAQs
How do you repair roof flashing?
To repair roof flashing, seal small cracks with roofing sealant or replace damaged sections with new metal flashing. Make sure it’s securely fastened and properly installed under shingles to prevent leaks.
What are common step flashing mistakes?
Common step flashing mistakes include improper overlap, failing to install flashing between each shingle layer, using continuous flashing instead of step pieces, inadequate sealing, and incorrect fastening. These errors can allow water to seep behind the flashing, leading to leaks.
How does roof flashing work?
Roof flashing directs water away from vulnerable areas of the roof, such as joints, seams, chimneys, and vents. It creates a waterproof barrier that prevents moisture from seeping beneath shingles and into the structure.
What are the most important items to check when inspecting your roof?
When inspecting your roof, check for missing or damaged shingles, flashing around chimneys and vents, signs of leaks or water stains, clogged gutters, and sagging areas. Also look for granule loss and cracked sealants, as these can indicate aging or potential water intrusion.
What are typical issues with flashing?
Flashing is a transient phenomenon. Roof flashing may deform due to seasonal temperature variations.